Caractéristiques
- Modèle:
Universal Handguns
- Type d'arme:
Glock
- Poids du colis: 0.068kg
- Hauteur d'expédition: 13mm
- Largeur d'expédition: 107mm
- Longueur d'expédition: 175mm
Universal Handguns
Glock
Le prix inclut la TVA mais pas la livraison .
Référence: 777100017
N° fabr.: G-1
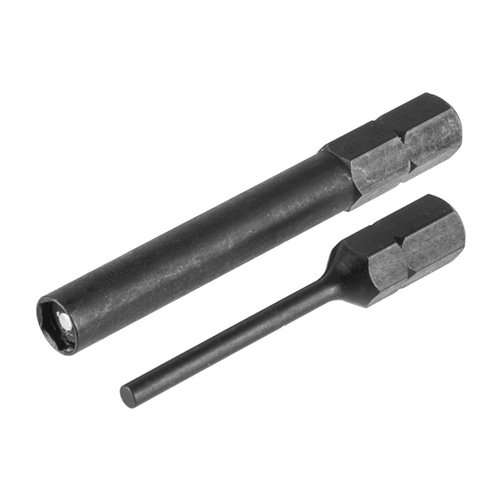
Le même outil utilisé à l'usine Glock pour retirer et installer avec précision le liner de canal de percuteur. Cette pièce jetable, à l'intérieur de la glissière, doit être retirée et remplacée par une nouvelle lors du rebluing ou du refinissage des glissières Glock. Outil facile à utiliser qui ne endommagera pas et ne marquera pas la glissière. Comprend des instructions complètes, un protecteur de filetage, ainsi qu'un liner de canal.En rupture de stock, délai de livraison d'environ 4-12 semaines depuis l'entrepôt des États-Unis.
Le prix inclut la TVA mais pas la livraison .
Découvre le CHANNEL LINER TOOL de RIMFIRE GUNWORKS, l'outil indispensable pour retirer et installer le liner de ton Glock sans endommager la glissière.
Cet outil est le même que celui utilisé à l'usine Glock pour retirer et installer avec précision le liner du canal de percuteur. Cette pièce jetable, située à l'intérieur de la glissière, doit être retirée et remplacée lors du rebluing ou du refinissage des glissières Glock.
Voici quelques caractéristiques de cet outil facile à utiliser :
Ne manque pas cette occasion d'améliorer l'entretien de ton Glock avec cet outil de qualité!
Universal Handguns
Glock
No design flaw after all 08.03.2018
I would like to rescind my earlier review of this product. It turns out that the reason the tool was bottoming out is because there wasn't any channel liner installed in the slide at all. I assumed there was because I couldn't get the new channel liner installed, as if it was being blocked by something. The slide is at fault here, not the tool (by the way, it's a 3rd-party slide, not OEM). So the only design flaw this tool has is that you have to tap on the threads in order to install the channel liner. It's a real simple tool to use, and it works well. By the way, another reviewer complained that the tool damaged the channel liner when removing it. There's only two reasons (that I can think of) why you'd ever want to remove the channel liner. First, it's damaged and needs to be replaced. In that case, what does it matter if the tool damages an already-damaged channel liner? Second, you're refinishing the slide and the liner has to be removed before doing so. If you're investing all the time and expense to refinish a gun--assuming it's a real finish and not spray paint :-)--I think you can afford an extra three-and-a-half bucks or less for a new channel liner. It's just a part of the total refinishing cost.
Slick Tool 07.03.2018
This is a brilliantly designed, easy-to-use tool, but the designer made one bad assumption about removing the channel liner. He/she assumed that the channel liner would be intact. In all fairness, so would have I. However, if a sufficient portion of the channel liner is missing, then the tool "bottoms out" without making contact with the liner. The threaded portion of the tool should be extended all the way up to as close to the crosspin as possible; it doesn't even have to be threaded the entire way, just made the same diameter as the firing pin channel.
The second "flaw" (for lack of a better word) is that when installing the channel liner, if you want to tap on the tool you'll be making direct contact with the threads on the removal side of the tool. There could have been a striking surface manufactured into the tip of the threaded portion for that purpose. Use a leather mallet or similar and take care to protect the threads, because it's the leading threads--the ones you're pounding on--that dig into the channel liner for removal.
Now with all that said, this is a really slick tool, and as I already said, brilliantly designed. That is evident by the wing nut & non-marring plastic washer that is used to initially dislodge the channel liner, and the crosspin to give you a good yanking grip. It's kind of a shame that it only has one specific use (and something you'll do rarely at that, unless maybe you're a professional refinisher), but it is THE right tool for the job.


Nous avons rencontré une erreur lors du chargement de ce contenu. Veuillez actualiser la page pour continuer. Si le problème persiste, contactez notre service client.